here are a few things I've learned:
1. Normal sharpies do not work unless it is for a display piece
2. Cheap mugs at the dollar store work better since the glaze on the mugs are not so great so the marker tends to stick on it better
3. If you want to use sharpies get the Sharpie Paint brand that are oil-based.
4. Pebeo works the best but are also the most expensive, DecoColor is second best, and I would recommend the oil-based sharpie afterwards. ( I haven't actually experimented these myself but this is what my research has lead me to conclude).
5. Use a pencil to outline your design first, you can be fancy and transfer a printed design onto a mug using paper and pencil by imprinting the graphite onto the mug. Sorry, won't go into detail on that here.
6. Use books or something to rest your arm on while you draw your design for stability.
7. If you mess up, its not the end of the world. You can clean off the marker before if dries or even before you bake it.
8. Although most markers say to let dry for 8 hours, just let it dry for about 24 hours to be safe.
9. Do not take the mug immediately out of the oven after baking, let it cool in the oven or it can crack from the temperature change.
I bought the mug a couple months ago at the thrift store so I was not sure how well the marker would stay. When I washed it, hairline cracks were apparently all over the mug. I do not know anything about pottery or mugs so I had no idea if the mug was safe or not. There was no indication at the bottom that told me it was oven or dishwasher safe. So I decided to wing it.
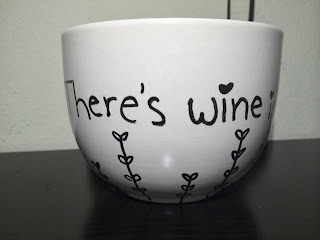
$1 Ginormous soup mug from Thrift Strore
MISTAKE!- At first I tried to gauge how the design would look by drawing on it with a pink expo marker. Worst mistake ever. The cracks become apparent when the mug is washed or becomes wet so the expo marker seeped into these cracks. Now there is a light pink web around the "Shhh..." area.
After that mishap, I sketched out the design on my white board.
I did a lot of online shopping. I and I decided to get the oil-based sharpies at Wal-Mart. Except when I actually when to the closest and happens to be the most ghetto Wal-Mart around they did not have it. Jo-Ann happens to e-mail me a $5 off any $5 minimum purchase. So I went there the next day. They did not have the DecoColor in the size that I wanted but the DecoArt is for glass, it also says ceramics so I got that instead. The marker was $3.99. I bought two so I could use the coupon. Ultimately, I paid $3.18 for both of them.
With the Coupon each Marker was $1.59 including tax.
*(Side Story) SO, there was also an online coupon for 50% off one regular priced item. I asked the cashier man if I could use both. At first he told me, the $5 coupon was not valid until next week. I proved him wrong by showing him the email. I should have known then that he did not know what he was doing because he then proceeded to tell me that if I used the 50% off coupon the $5 off would be invalid because it would be under $5. I hesitated a little because I thought I had done the math right in line, but I assumed he was right since I did mental math and sometimes I am wrong. WRONG. After buying the markers I went to my car to recalculate it and I was right! WARNING MATH AHEAD: $3.99 x 0.5 Coupon = $1.995 for one marker. $1.995 + $3.99 second marker = $5.985 for both. They took off the $5 before tax but either way. The amount was very much over $5 Jo-Ann man. My point is I could have paid $1.05 for both markers, making each marker to $0.53... I was upset since I did not get my super awesome deal but the argument was not worth those $2.13.
I sketched out my design on the mug using a pencil. I wanted the quote to wrap around the mug because I wanted to fill up all that wasted space also I wanted a design on it too. I used about 3 textbooks to rest my arm on for stability while I traced the outline with the DecoArt marker. I forgot to take pictures again.
Here are the final Results!
So awesome! Shhh... this is mom's X-mas present so do not tell her.
I had an extra clear bag and ribbon from Bath and Body Works. I thought it would be cute to wrap it like one of the candles.


Wow a DIY gift! Haven't tried it yet with my Sharpie Products Philippines.
ReplyDelete